
Glaze Tips
Glazing is my favourite part of the process (by which I mean developing and testing glazes, the actual dipping and pouring is less interesting) but I know a lot of potters dread it. It’s understandable, it’s the final stage in a long process and can easily ruin weeks of work. There’s no magic cure for that, ceramics can be harsh and unforgiving, but there are ways to make the most of your glazes.
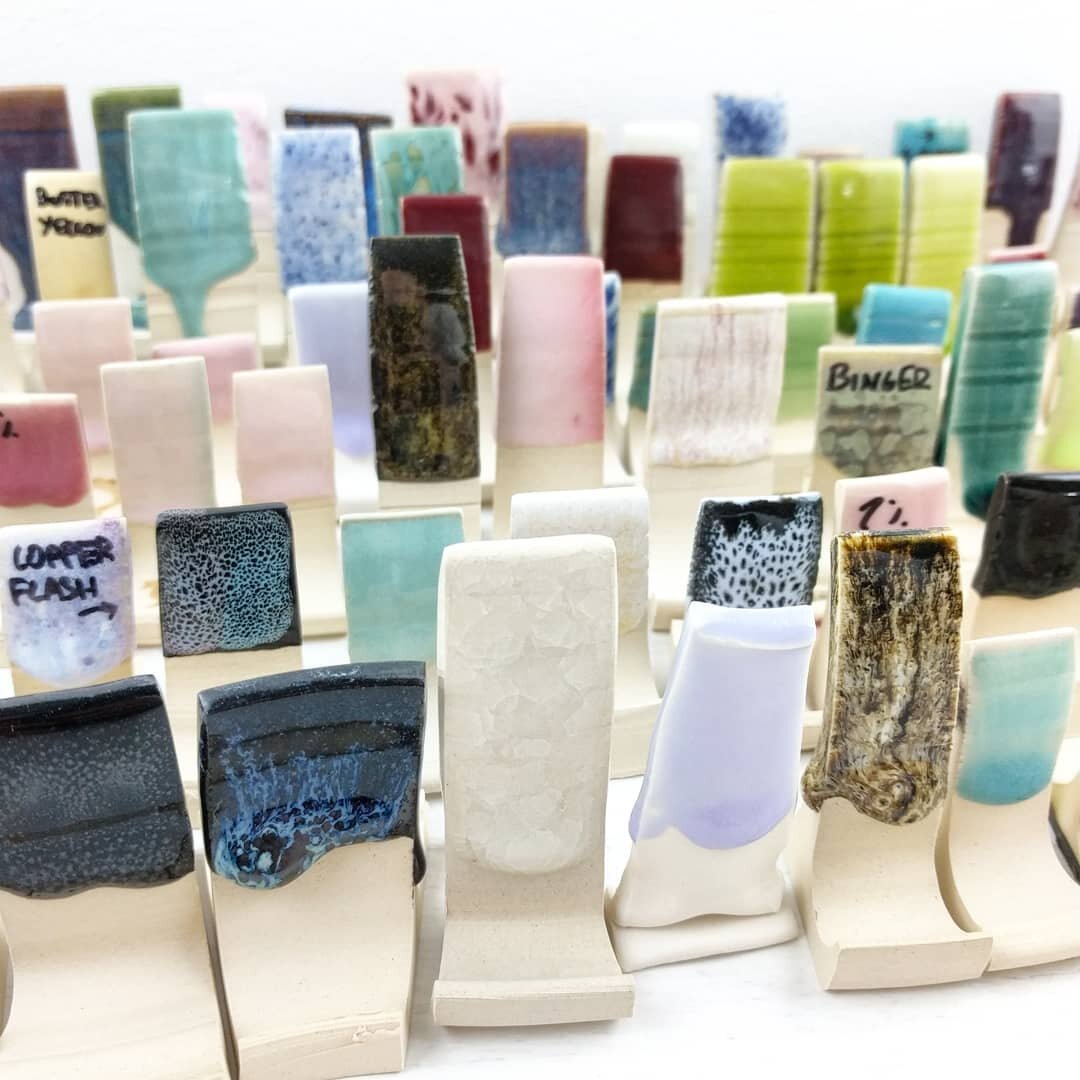
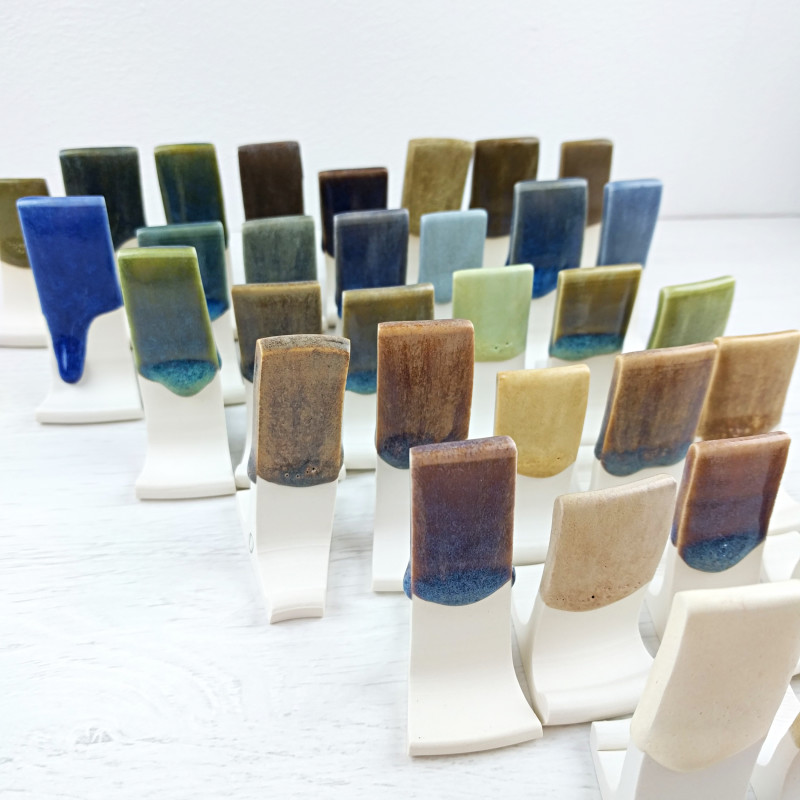
Test, Test, Test. (Then curate)
There is no substitute for time spent testing. Depending where you are on your glazing journey, this could mean a variety of different things. If you’re using premade glazes, whether bought or from a shared studio, then you still have a variety of thing you can find out. You ideally should know:
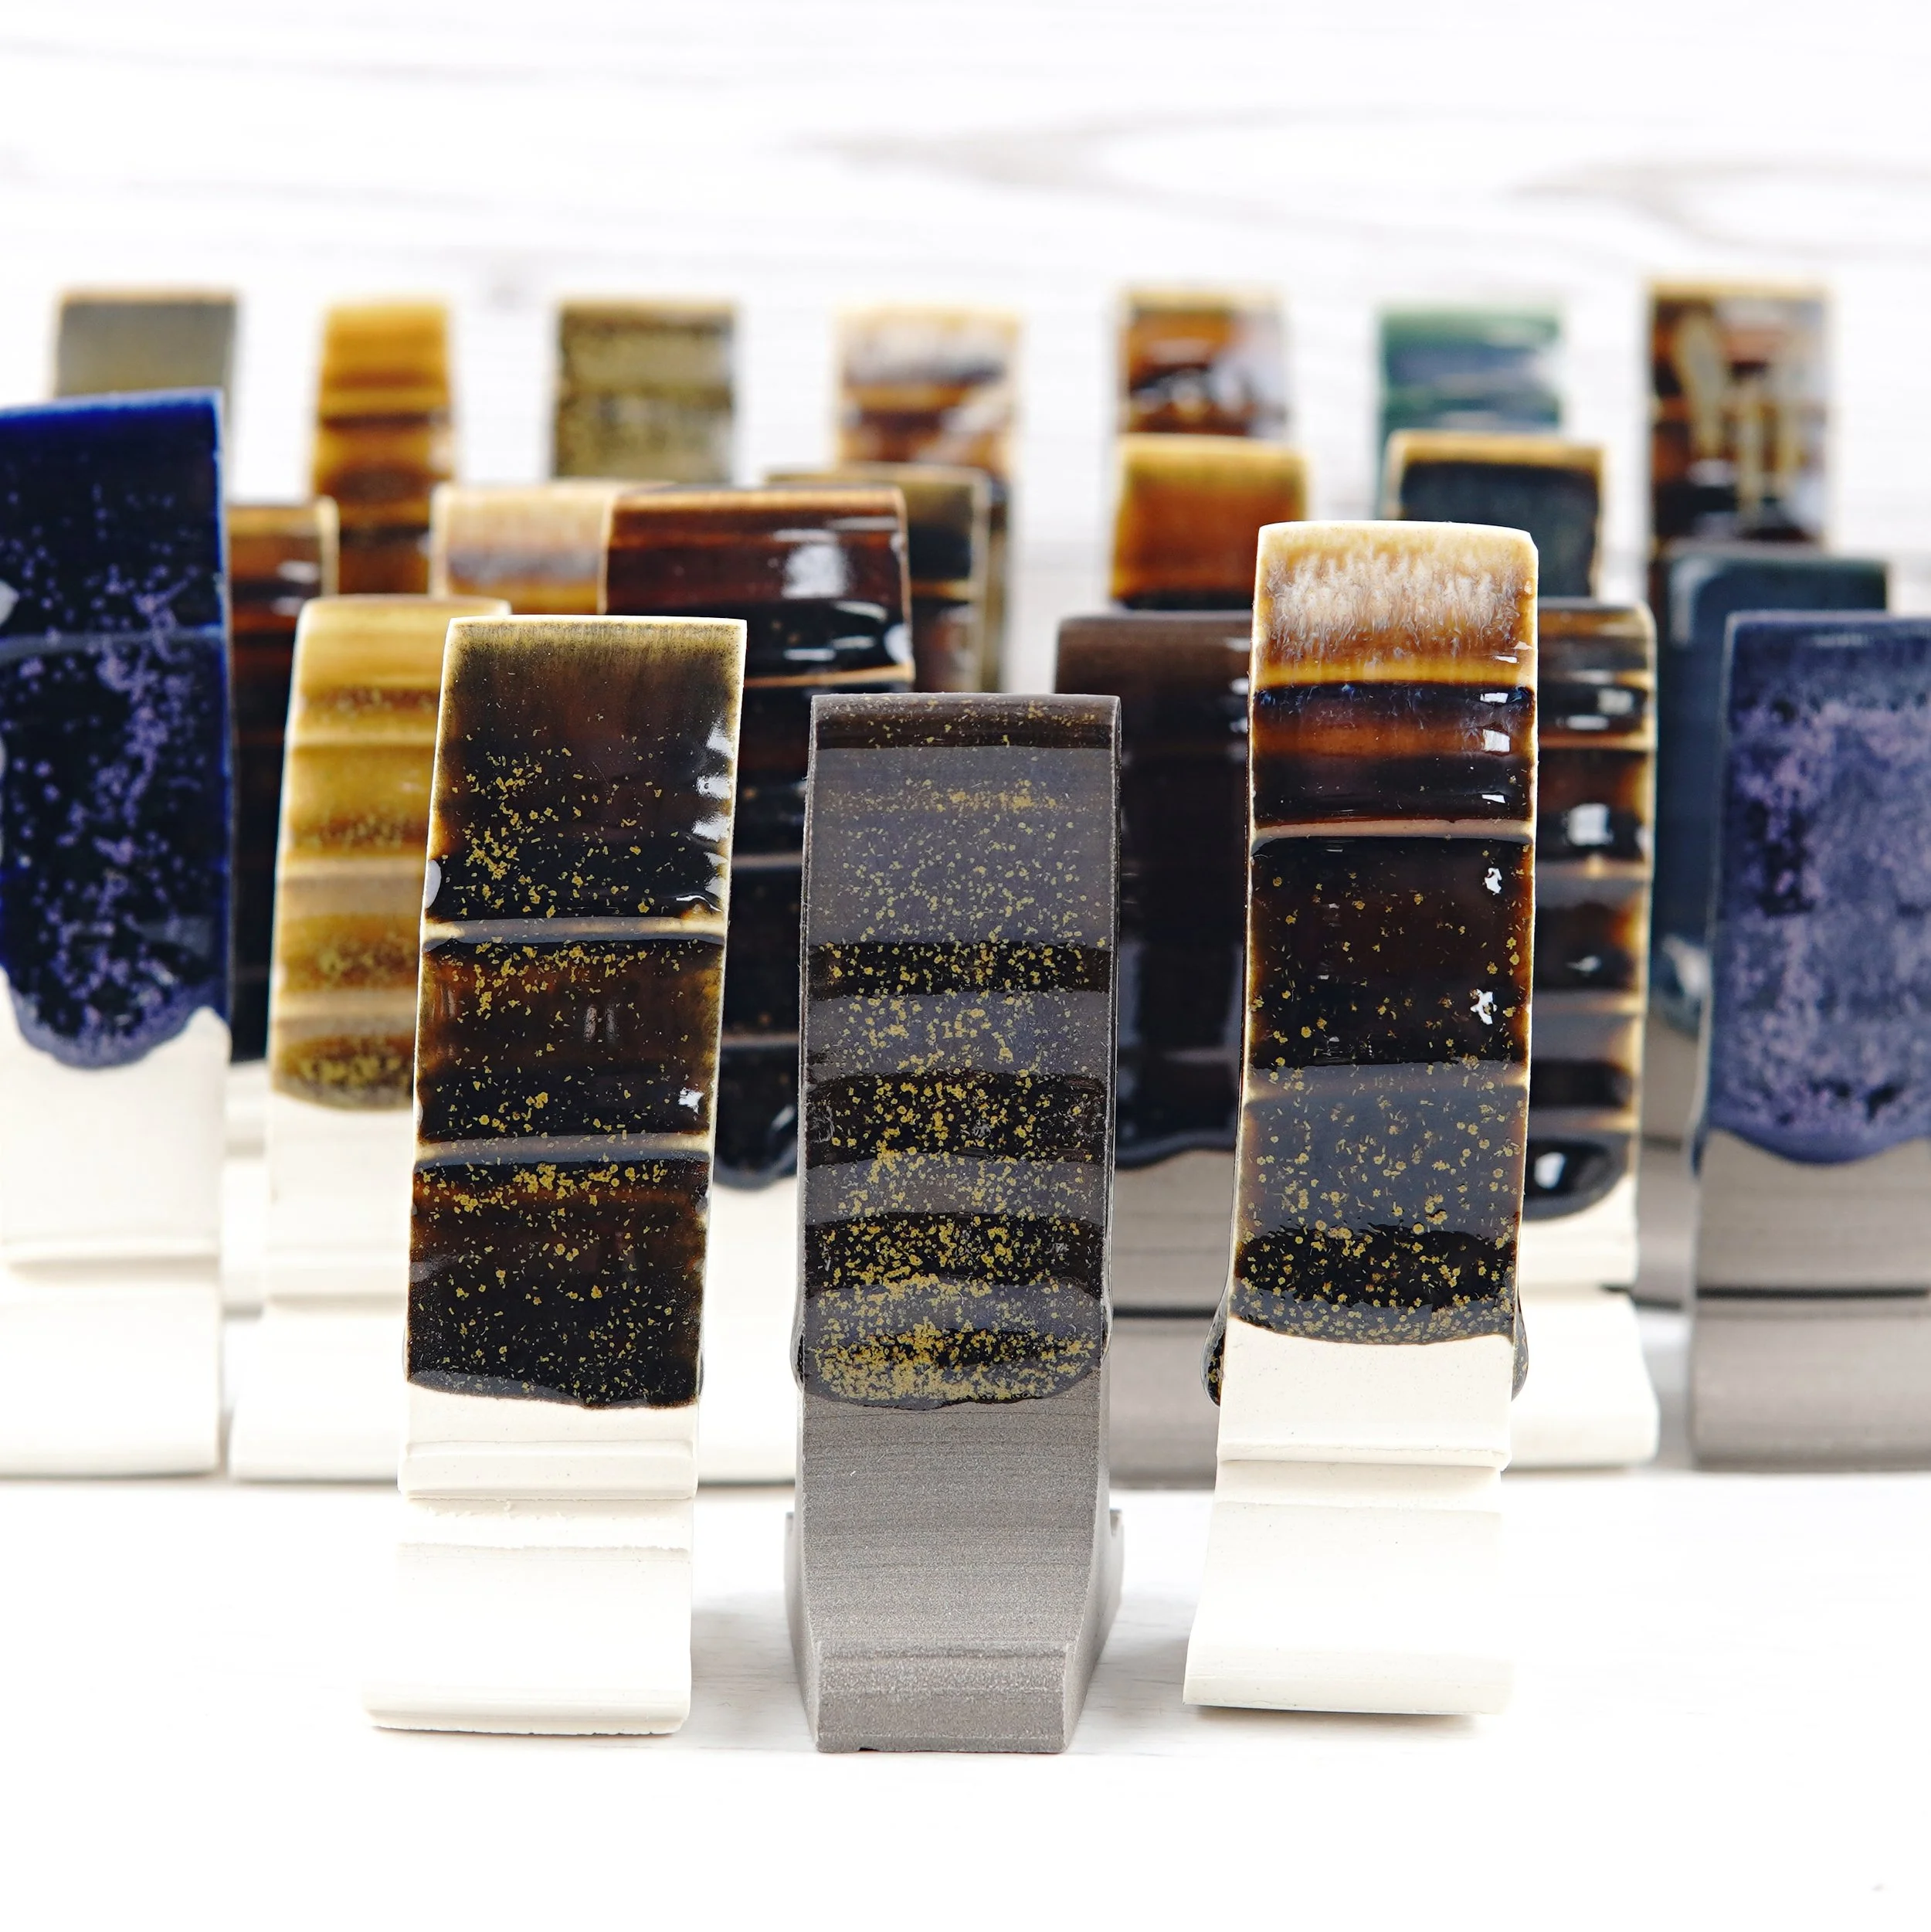
What each glaze looks like at various thickness. Some glazes are totally different at different thicknesses, some are identical. You need to know if a glaze result requires a certain application.
What a glazes will look like over various clays/slips/underglazes (if you use them). Some glazes will totally change over different coloured clay. A thinner application of the Floating Blue recipe I use will be very sensitive to the clay it’s on, and it’s good to know that when applying it. I don’t like the colour as much over white clay so I make sure to apply it thicker, but love a thin application over black slip/underglaze. I throw my test tiles with black slip on the reverse to see what a glaze will look like over two clays in one tile.
What the glazes do in combination. It’s not always what you think! It’s nothing like mixing paint, if they mix together you’re combining two recipes to come up with a totally new one, and if they stay separate then you can get things like oil spot patterns where the physical movement of one glaze in the firing will create an entirely new pattern. Test a glaze over and under another glaze to see what works best.
If you have oxide washes, test the glazes over those too. This is similar to combining glazes, but generally more straightforward.
And if you’re wondering whether you should be buying premade glazes or mixing your own, Kara has a great blog post about it. The simple answer is to do what’s right for you. Making your own has a bunch of advantages in the long run, but if you’re doing this in your spare time for fun then it might take quite a while to get to that stage.
If you make your own glazes but you’re not comfortable with the chemistry, then you can try removing the colourant and swapping them for others. Again, this isn’t like mixing paints, you might find it does something unexpected.
If you make your own glazes and understand the chemistry, then you probably don’t need any of my suggestions!
And after all the testing, put all but the best tiles aside for reference later, and only continue with a tiny percentage of them. Curation is just as important as testing.
Most importantly, and I say this knowing full well that everyone will do it anyway, don’t use untested combinations on pieces you like! I know it’s tempting, you have a unique piece and you think you can make it even better by using a new combination of glazes that work perfectly in your head. I’ve done it so many times, and I’ve always regretted it. I know you’ll still ignore it for the first few times, but hopefully it’ll sink in faster for you than it did for me.

Thickness
Depending on the glaze, this can be the most important factor to getting the results you want. Clear glazes generally benefit from being thin to limit cloudiness and bubbles. Opaque glazes of a single colour can be thick or thin depending on how much you want the clay to show through. Where it becomes crucial is with layered flowing glazes. If you apply these too thinly you probably won’t get the colour or movement you’re looking for.
One thing you will almost certainly encounter if you try to apply multiple layers of glaze thickly is that there can be a tendency towards peeling off as the glaze dries. If you have this issue with a thin layer of a single glaze, then there are things you can do to resolve it. However, even if your glazes are perfectly happy going on in a single thick application, when combined in a thick layered application you can often have issues. There are two easy fixes.
The first is riskier but faster, and that’s to apply the second glaze thinner than needed initially, then brush more onto the piece when it’s dried. The brushed-on glaze will fill the small cracks that can start to form and stop them from crawling in the firing. This works well if the glazes are pretty much fine anyway, and you just want to add a little more to make sure the application is thick enough.
The second is a safer, more costly fix, and that’s to bisque fire the first glaze before applying the second. It requires another firing, but this way the glaze is permanently fused in place and cannot crawl. That teapot was then layered in Chun Seafoam, a glaze that I stopped using because of how badly it wants to crawl. With the base layer fixed in place, the flaws in the top glaze can enhance the pattern created in the fired result. This technique is also useful if you want to build up a glaze to a thickness that would be a problem otherwise. Unfortunately it doesn’t always work, and one of the glazes I’ve never got it to work with is the Snowflake/Kuan Crackles. It’s a shame as they benefit greatly from a very thick application.
Some glazes will want to be fused at a temperature lower than your bisque, and you can find interesting results by fusing at the higher temperature.
Understanding your Glazes
As per the first section, understanding your glazes comes in several layers. At the basic end you just want to understand how your glazes (bought or made) behave in various different conditions. That will get you a long way, but comes with limitations. The next stage is to understand the chemistry that the glaze recipe represents, as that’s all a ceramic recipe really is at the end of the day. The chemistry determines the behaviour, and the recipe is one of many ways to achieve that chemistry. By understanding what each ingredient brings to the mix, you can start to understand why recipes produce the results they do, and how to adjust them to change the characteristics.
I know I might sound like a stuck record and/or like I’m being paid to promote them (I wish!), but I honestly can’t recommend the CMW classes highly enough for really getting to grips with the chemistry of the glaze ingredients. Prior to taking the course I just used recipes I found in books and online, if I had an issue with one I’d just abandon it and look for another recipe. I had a decent idea what the colourants did, and could adjust those as needed, but the base glaze was a mystery to me. The CMW are a systematic approach, where each new bit of information builds on the previous ones and puts it all in context.
It’s like following origami instructions one at a time rather than being given a dozen pictures of finished cranes and being left to figure out the sequence yourself.

If you’re interested in adjusting or creating glaze recipes, but don’t know what all the numbers on Glazy mean, I really would recommend taking a course.
Other Tips
Smaller things that don’t deserve a whole section, I’ll edit more in as I think of them.
Clean your Bisqueware - Try to avoid handling the area that will be glazed, especially with dirty/oily hands. Clean off any dust before glazing. I wipe everything with a damp sponge before glazing.
Check for sharp points - Slightly contradictory to the previous point (just make sure your hands are clean first!), run your hands over the rim and handle before glazing. Any sharp points should be sanded off before glazing. Don’t ignore them, they’ll ruin the piece and can’t be fixed after glazing. It’s even better to get in the habit of also checking this before loading a bisque kiln, as it’s so much easier to remove sharp points on greenware than bisqueware.
Drying - Let the pots dry overnight before firing if you can. Water in the kiln is never a good thing, especially if it’s still in the piece when the temperature starts getting hot. I also have an hour hold at 100c at the start of every firing to fully dry out everything, just in case
Wax Resist - I dilute mine quite a lot, I find it goes on much easier and does a better job of letting the glaze run back off.
Drip Catchers - Great if you use glazes that can run or drip. Read more here.
Dent Pullers - Small car dent pullers can make a great tool for dipping. Make sure the bottom of your pots is smooth and wax resisted first though.

Suggestions from Instagram
I asked for glazing tips on my Instagram stories and on Reddit, here’s a few of the top suggestions.
Document everything you do.
Make doubly sure there’s no glaze on the bottom of the piece.
Measure the Specific Gravity.
Use a piece of wet carpet to clean glaze off the bottom of dipped pieces.
Have a plan before you start!
It’s best to clean glaze splashes/mistakes off when they’re dry by scraping, rather than trying to do it while they’re still wet.
Don’t rush!
Always try to get at least one experiment into every kiln load.
Wax resist on the wheel rather than freehand.
Make sure your glaze is mixed thoroughly before applying. You can use an immersion blender or an electric drill with a mixer attachment, or just shake it if the container is small enough. And remix if you’ve been using a glaze for a little while, it will separate back out over time.
Try to keep an open mind when evaluating results. Give yourself the evening and sleep on it. Tiles look different the next day
When layered glazes crack: deflocculate! A drop or two of sodium silicate will make the glaze hold onto less water and it will stop it from cracking.
If your glaze hard pans, it's not worth it to use it. Spending 20 minutes mixing it up to dip a piece that doesn't turn out well because you still didn't get everything stirred up is a waste of time and kiln space.
If there’s anything you’d add to the list, please leave it in the comments below!
Please let me know how you get on, message me or use the hashtag oldforgecreations (I often miss @mentions on Instagram and there's no way to find them afterwards, but I'll see the tag). Good luck!
If you like this sort of content and want to support the creation of more, I now have a Patreon specifically for it or a page on my website if you just want to make a single donation.